This fermented cashew cheese is rich in probiotics, healthy fats, minerals and plant protein! A wonderful, vegan alternative to cheese made from dairy!
Certainly, when making dairy-free cheese, we could just mix some ingredients and add nutritional yeast for the cheesy flavour, et voilà!
BUT these kinds of “cheese” don’t really have any (gut-)health benefits. So, what if I told you, you can make vegan cheese that not only tastes amazing but also supports gut health??
Well, I think that this fermented cashew cheese is even tastier than regular cheese! It reminds me a bit of a mix of feta and Camembert/brie! It’s just got this nice tang to it!
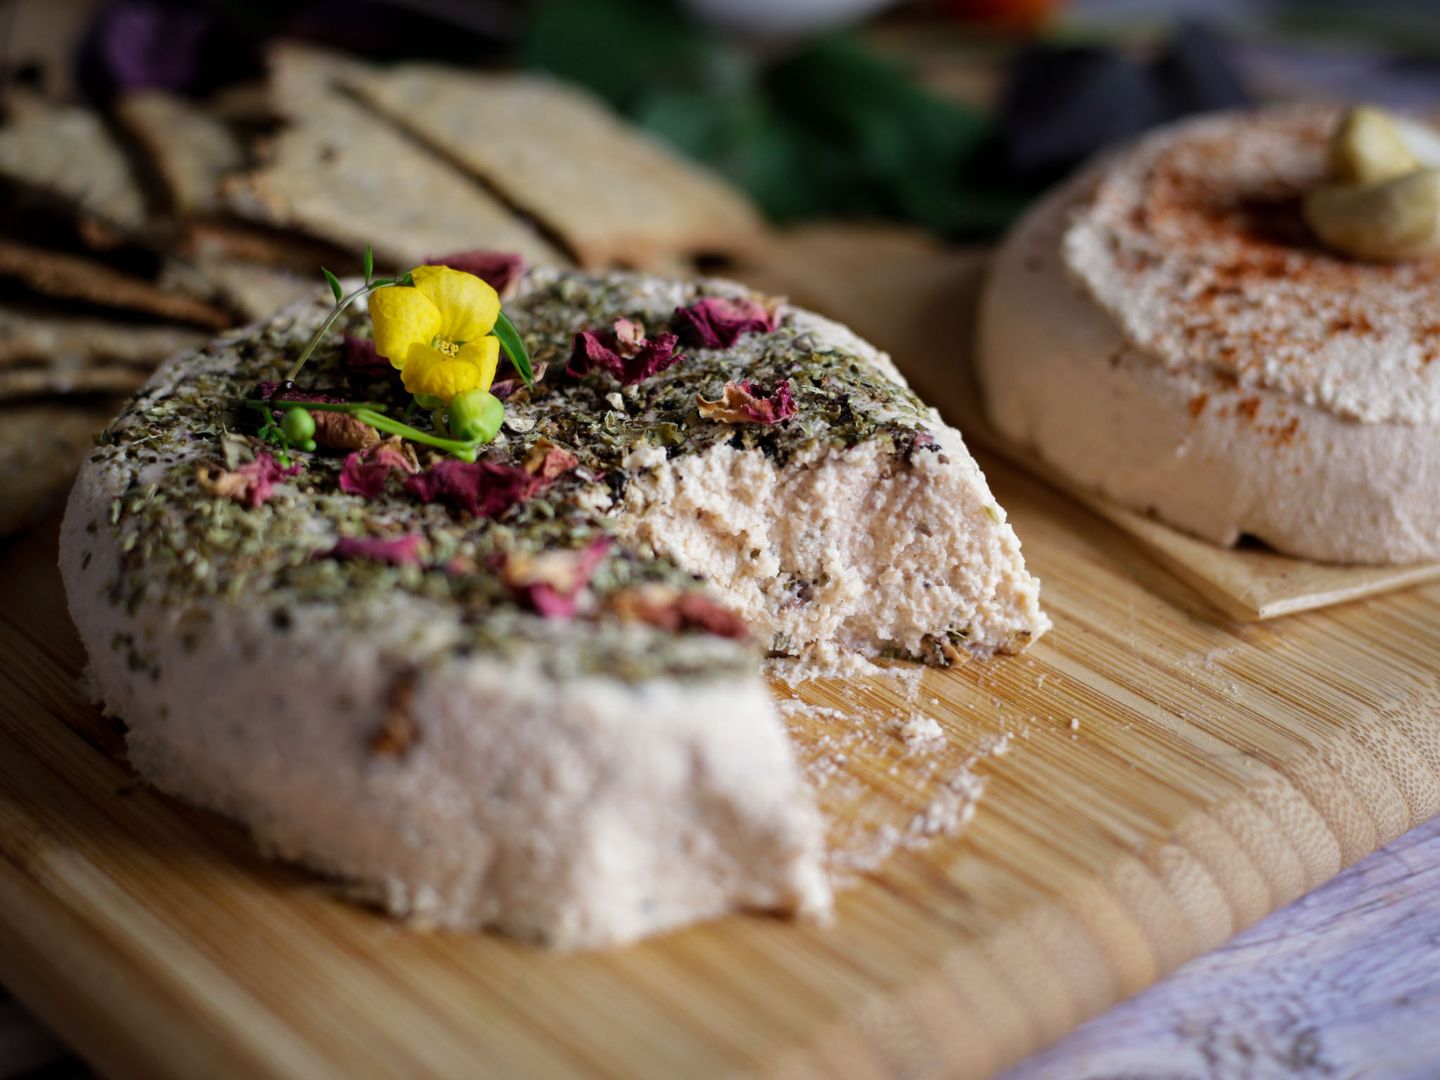
And last but not least, I’m going to give you two options to make/serve this cheese. I've got you covered whether you want to have it as a yummy dip or feel like something fancier (see instructions).
So, what are we waiting for? Let’s make some CHEESE!!!

Ingredients
Affiliate Disclaimer: This article contains affiliate links. That means I may earn a small commission, if you purchase the linked product, at no extra cost for you.
- cashews
- water
- onion powder
- salt
- smoked paprika
- sauerkraut juice
- coconut oil (for artisan version only)
(for quantities see recipe card below)
I keep my fermented cashew cheese fairly plain. Have a look below for more ingredients you can add, or which you can swap (see substitutions), or check out variations for more inspiration!
Cashews: Cashews are just the best nuts because they have a nice, creamy texture and a relatively mild taste.
Spices: I find onion powder gives it a slightly cheesy taste and I love adding smoked paprika for the yummy smoky flavour!
Sauerkraut Juice: Sauerkraut juice is the secret ingredient and is responsible for proper fermentation! It’s loaded with probiotics that are sooo beneficial for our gut health!
Make sure to use organic sauerkraut to avoid any chemicals! Also, try to use its juice as fresh as possible, i.e. after you’ve just opened it. That ensures it’s as active as can be!
I made this recipe once with juice from sauerkraut that I’d just finished. I had it in the fridge for a few months so I reckon all that healthy bacteria died over time because the cheese simply did not rise at all (but it was yummy nevertheless).

Additional Ingredients
- nutritional yeast
- lemon juice
- garlic powder
- turmeric
Nutritional Yeast: A vegan’s best friend, right? Well, I don’t like it and don’t use nutritional yeast because it’s too processed for me (I go a bit more into that in my vegan parmesan recipe, if interested).
However, feel free to add it, if you like to enhance the cheesy flavour in this recipe. You can add about 1 or 2 teaspoons, to taste.
Lemon Juice: Some people like to add lemon juice to their vegan cheeses for that nice tang. You can try it in this recipe (juice of half a lemon), if you prefer or would like to try it out.
Garlic Powder: Just like onion powder, I find, garlic powder can produce a natural cheesy flavour. You can also use it instead of onion powder, or add a mix of onion and garlic powder!
Turmeric: If for whatever reason, you’d like to add some colour to your cheese (so it looks more like dairy cheese), you can add a pinch (up to half of a teaspoon) of turmeric!

Instructions
There are two options for you to choose from. They’re both made the same way, however, if you want to make artisan cheese (like the ones in the photo) or fermented cream cheese, you need to add a few tiny extra steps.
If you make the regular recipe, you’ll have a spreadable dip, just like hummus. This fermented cashew cheese doesn’t get firm naturally (i.e. with fermentation).
Regular Fermented Cashew Cheese

Step One. Place the cashews in a bowl and cover with water. Add a generous pinch of salt to it (about 1 teaspoon). Soak them for at least 4 hours (or better overnight!!).
Step Two. Drain and rinse the cashews and add them to a blender. Add remaining ingredients (water, salt, sauerkraut juice/brine, onion powder and smoked paprika) and blend for about 1 minute until smooth.
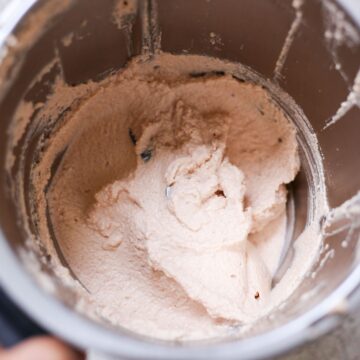
You may need to pause and scrape down the sides. Sometimes adding a tiny bit more water helps as well. You just really want to make sure it’s as creamy as you can get it.
[I used beetroot sauerkraut juice. That's why the cheese is a bit pink]
Step Three. Pour the mixture into a clean, sterilised jar with a lid (airtight is best). Ensure that the jar is large enough!! Throughout fermentation, this cheese will grow and expand! Give it at least 5cm/2inches of space above.
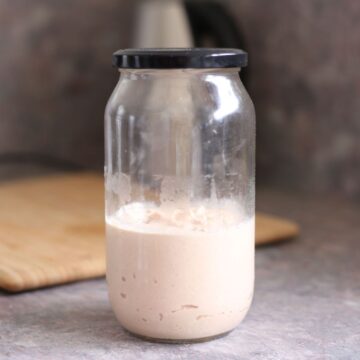
Screw the lid on fast. This fermentation process is anaerobic which means, it doesn’t need air! So try to keep it out!
Step Four. Now, find a dark and warm spot for your cheese. The ideal temperature for fermenting it is around 24 °C/75 °F. The pantry usually works well!
I live in a hot climate and it was for sure a bit warmer than 24 degrees and it still worked. I just had it sitting on my kitchen floor in a corner, with a towel wrapped around it.
WARNING!!!! Every 12 HOURS, unscrew the lid and let the air out that has accumulated while fermenting. Otherwise, your jar MAY BURST!
Nope, this is not a joke, there can be a lot of pressure! You’ll hear and feel it when you pop it for the first time!
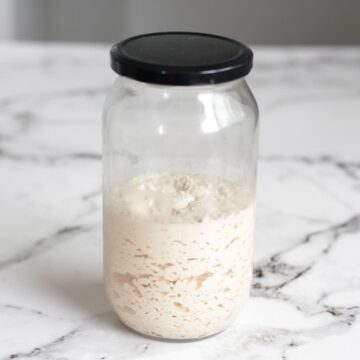
Step Five. Ferment the cheese for 12 – 36 hours. Depending on the sauerkraut juice (some are more active than others) and on the temperature (if it’s colder, it may take a lot longer), the cheese should bubble within the first 12 hours.
Try your cheese after 12 hours of fermenting, if it already suits your taste. If not, keep fermenting it. I love it when the flavour is quite strong, so I always ferment mine for at least 24 hours!
It sometimes does take longer than that, so don’t worry. However, if the cheese doesn’t rise after 24 hours, it may not happen at all. As mentioned earlier, this happened to me once.
Just stop fermenting it, put it into a container and keep it in the fridge. It’ll taste almost just as yummy and makes a great dip! Next time, use a different sauerkraut juice and/or make sure it’s warm enough for the fermentation to happen!

Step Six. Now, your cheese is ready to go! Give it a stir to get rid of the air bubbles. You can store your fermented cashew cheese in a container instead of a jar if that makes it easier.
I like pouring my cheese into a shallow container, so I can easily access it with a knife and spread it onto my sandwich or dip my crackers in it!
Artisan Fermented Cheese
Step One. Proceed just as described above, all the way to the end. Once your cheese has fermented to your liking, add ¼ cup / 50g coconut oil to it and mix well.
Step Two. Line 1-2 small bowl(s) with a cheesecloth, baking paper or wax wrap. If you want some herbs, dried flowers or cracked pepper on the top like with the one you see in the pictures, place them in the bottom, on top of whichever lining you’re using.

Step Three. Pour fermented cheese into the lined bowl(s) and cover the top with the overlapping lining—just so the top doesn’t dry out in the fridge!
Step Four. Put into the fridge to set for a few hours. I just leave it to set overnight. Afterwards, pull it out of the bowl by holding onto the lining (aka cheesecloth, baking paper or wax wrap).
Place a plate or serving platter on top (whichever you want to use) and turn the cheese upside down. Remove the lining. Sprinkle with more herbs, cracked pepper and/or dried flowers, or garnish with smoked paprika and cashews. Just be creative!
Your cheese is now ready to be served!
Substitutions
Cashews: Instead of cashews you could also use macadamias or almonds. They both have, of course, different flavours and slightly different textures (not as creamy as cashews).
Spices: You can leave them out, too, and replace them with nutritional yeast if you prefer. Or try garlic powder, turmeric or even cumin instead.
Sauerkraut Juice: Substitute sauerkraut juice with coconut water kefir! I haven’t tried that yet but read that people were successful using it!
I also read that you can use apple cider vinegar. However, the results are simply not as good as with sauerkraut juice and the fermentation takes a lot longer too.
I highly recommend sticking to sauerkraut juice or kefir because they work best and you already have this beautiful gut-healing bacteria in them!
Variations
I highly encourage you to be creative and try out different flavours!
Herbs: I love, love, LOVE adding oregano at the end and stirring it through. If you know, you’re going to use up the cheese within 2-3 days, you can also use fresh, chopped herbs like parsley or chives!
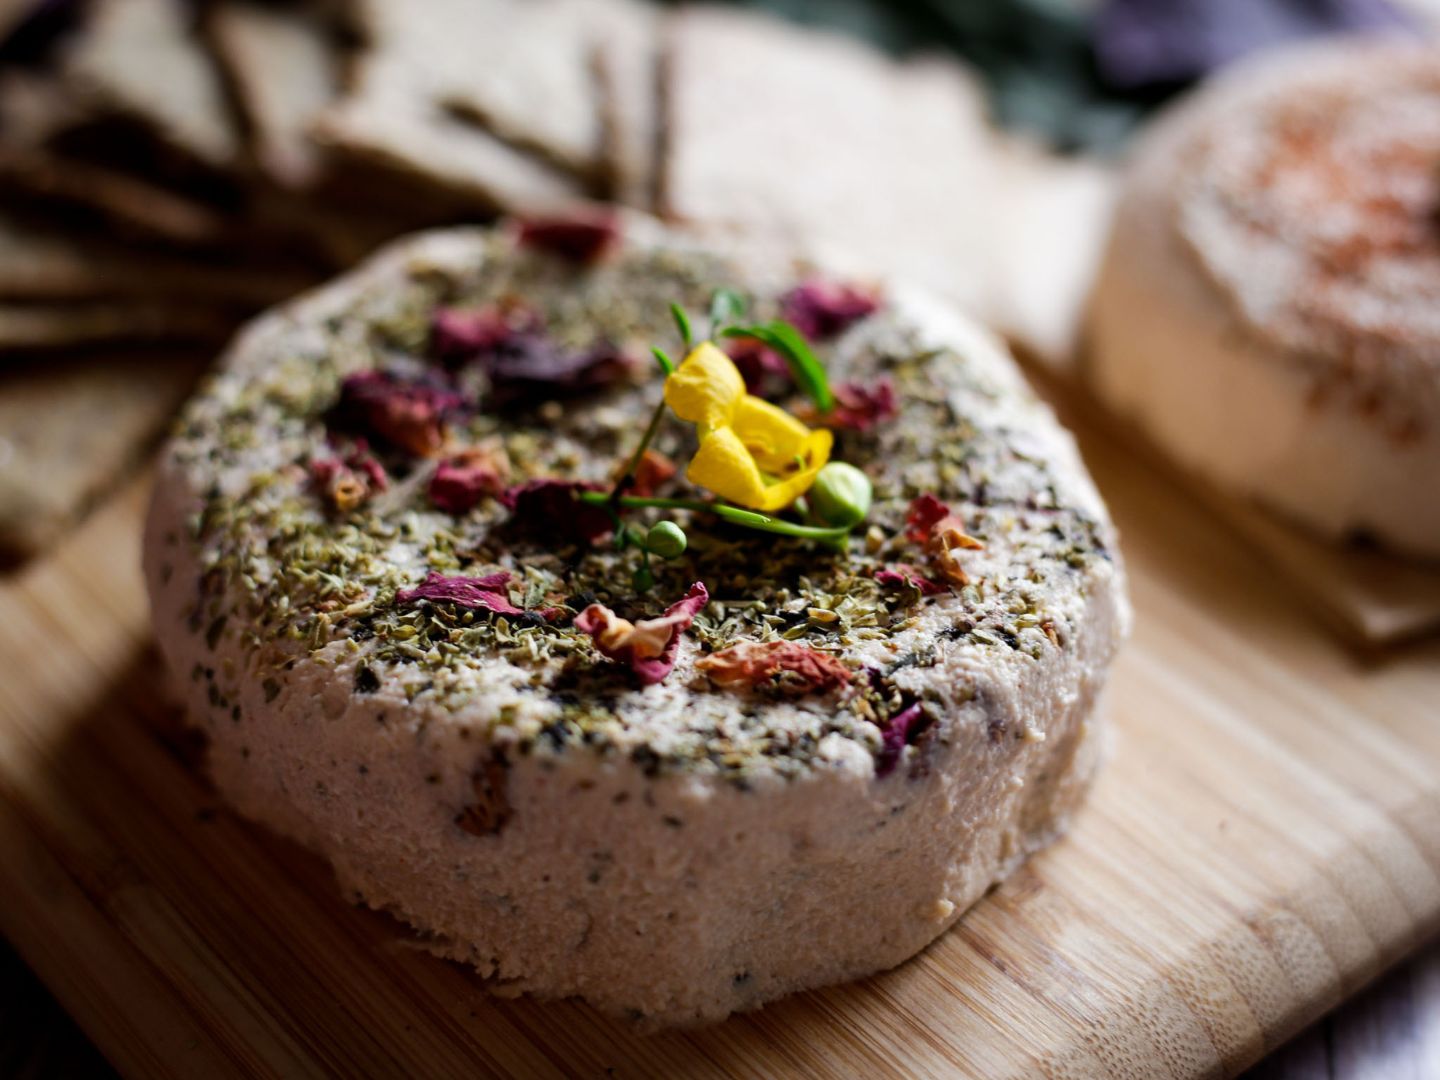
Pepper: Some freshly cracked pepper makes such a big difference! I like to top my artisan cheeses with it or stir it through the dip! The longer you leave the pepper to infuse in the cheese, the better! It’s sooo yum!
Olives: Chopped olives and some olive oil—that’s it! Soo good!
Sun-dried Tomato: After fermenting, add the cheese and a handful of sun-dried tomatoes to a food processor and blend!
Storage
After the fermentation (12-36h), the fermented cashew cheese needs to be kept in the fridge to prevent any further fermentation!
You can keep the cheese in the jar that you used for fermenting it, however, I recommend transferring it into a new, clean container for easier use and to ensure a longer shelf-life.
Generally, the cheese keeps for 1-2 weeks, if not longer, in the fridge. I like to say: it goes bad when it goes bad! When it does, you’ll definitely get a sour taste and may notice a pinkish, lightly orange discolouration.

Food Safety
When fermenting, we’re technically spoiling the food—but controlled!! Ensuring we’re creating and multiplying the GOOD, the healthy, bacteria.
However, it’s always possible that the BAD, the proper spoiling, bacteria gets in. Whether your jar wasn’t 100% clean or the bacteria was already on your ingredients, this can always happen.
If you notice any weird, maybe even unpleasant fizzy, taste, it’s not worth it. Don’t risk your health! Chuck it, and start again!
📖 Recipe
Ingredients
- 300g / 1 ½ cups cashews raw
- 100ml / ⅓ cup + 1tbsp + 1 tsp water
- 2 tbsp sauerkraut juice or water kefir
- 1 tsp salt
- 1 tsp onion powder
- ½ tsp smoked paprika
- 50g / ¼ cup coconut oil softened or melted, optional, for artisan cheese only
Instructions
- Place the cashews in a bowl and cover with water. Add a generous pinch of salt to it (about 1 teaspoon). Soak them for at least 4 hours (or better overnight).
- Drain and rinse the cashews and add them to a blender. Add remaining ingredients (water, salt, sauerkraut juice/water kefir, onion powder and smoked paprika) and blend for about 1 minute until smooth.
- Pour the mixture into a clean, sterilised jar with a lid (airtight is best). Ensure that the jar is large enough!! Throughout fermentation, this cheese will grow and expand! Give it at least 5cm/2inches of space above. Screw the lid on fast.
- Now, find a dark and warm spot for your cheese. The ideal temperature for fermenting it is around 24°C/75°F. The pantry usually works well! Ferment the cheese for 12 – 36 hours. WARNING!!!! Every 12 HOURS, unscrew the lid and let the air out that has accumulated while fermenting. Otherwise, your jar MAY BURST!
- Try your cheese after 12 hours of fermenting, if it already suits your taste. If not, keep fermenting it. I love it when the flavour is quite strong, so I always ferment mine for at least 24 hours!
- Now, your cheese is ready to go! Give it a stir to get rid of the air bubbles. You can store your fermented cashew cheese in a container instead of a jar if that makes it easier.
Artisan Fermented Cheese
- Proceed just as described above, all the way to the end. Once your cheese has fermented to your liking, add ¼ cup / 50g coconut oil to it and mix well.
- Line1-2 small bowl(s) with a cheesecloth, baking paper or wax wrap. If you want some herbs, etc. on the top, place them in the bottom, on top of whichever lining you’re using.
- Pour fermented cheese into the lined bowl(s) and cover the top with the overlapping lining—just so the top doesn’t dry out in the fridge!
- Put in the fridge to set for a few hours. Afterwards, pull it out of the bowl. Place a plate or serving platter on top (whichever you want to use) and turn the cheese upside down. Remove the lining. Sprinkle with more herbs, etc. or garnish with smoked paprika and cashews.
Notes
- Beginners: If you haven't made fermented cashew cheese before, please read the more detailed instructions in the blog post (see instructions)!
- Storage: After the fermentation (12-48h), the fermented cashew cheese needs to be kept in the fridge to prevent any further fermentation!
- Food Safety: If you notice any weird, maybe even unpleasant fizzy, taste, it’s not worth it. Don’t risk your health! Chuck it, and start again!


